Soil fumigation places a chemical (the nematicide) into soil where it can effectively form gases, which disperse throughout the spaces between soil particles, killing nematodes. The gases disperse in all directions but principally toward the soil surface, eventually escaping into the atmosphere.
Soil Preparation, Temperature, Moisure, and Sealing
Soil must be properly fumigated for satisfactory results. Planning is necessary; soil fumigation done on the “spur of the moment” is often unsuccessful. Soil is most often fumigated in late summer and fall because of soil temperature and moisture requirements.
Soil condition—When soil fumigation fails, the major reason is the improper soil preparation. Prepare the soil to seedbed condition by deep plowing followed by disking or rototilling. Most nematicides are not effective below an established plow sole, so till the sole to the depth of desired fumigation. Application depth may range from 8 to 18 inches, varying with the nematode or other target pest. Soil should be free of lumps, clods, and undecomposed organic matter. Plow down cover crops early enough that organic matter can decompose well. If necessary, irrigate and add nitrogen to hasten decomposition. Fumigate soil before applying manure, sawdust, or other organic materials.
Soil temperature—In Oregon, optimum soil temperature for nematicide application is between 70°F and 80°F. Manufacturers claim their materials are effective within a wide range of soil temperatures (40°F to 85°F) at application depth, but most materials are more effective at the higher temperatures. A very high soil temperature (above 80°F) is not desirable because the nematicide forms gases and evaporates too quickly to effectively control nematodes. At low soil temperatures (below 45°F) the nematicide may only partially form a gas, resulting in limited diffusion.
Soil moisture—Nematicides are not fully effective in very dry or very wet soil. Soil moisture should be slightly below field capacity for sandy soils and between 50% and 75% of field capacity in heavier soils. Soil is usually at the proper moisture level for fumigation when it barely retains its shape after being squeezed in the palm of the hand.
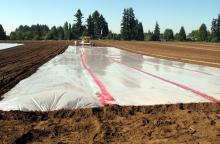
Soil surface “seal”—Gases rapidly evaporate and disperse from the soil surface, making it difficult to build up a lethal concentration in the top 2 inches of soil. Seal the surface immediately after fumigation to reduce gas losses. If fumigating a large area, seal as you go; do not wait until you have fumigated the whole area.
Seal in any of three ways.
- Pack soil with cultipacker, roller, weighted plank, etc. (Telone II and Telone C-17)
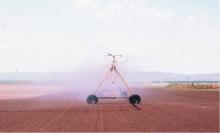
- Sprinkle surface with water. (Telone II, Telone C-17, metham-sodium)
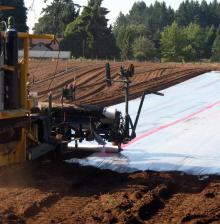
- Cover surface with plastic. (Methyl bromide + chloropicrin)
After sealing, leave the soil undisturbed as long as the manufacturer specifies; then aerate with a disk or harrow to help the last of the fumigant escape.
Application Method
Injecting the nematicide into the soil has been the most effective method of soil fumigation in Oregon.
Power-drawn Application Equipment
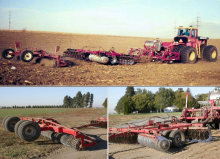
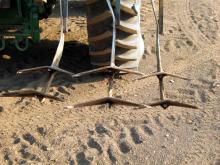
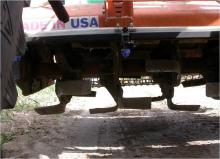
Chisel applicator—The chisel applicator is probably the most common device used for large-scale fumigation. The nematicides are applied behind chisels spaced 8 to 12 inches apart through a fluid system pressured by a gear-driven pump or compressed air.
|
Never use compressed air with Telone II or Telone C-17 because those products can form explosive mixtures with compressed air. |
Plow-sole applicator—The plow-sole applicator is designed to place the nematicide in the bottom of the furrow just ahead of the plow, where it is immediately covered with soil. Most plow-sole applicators rely on a gravity flow to move the nematicide through the fluid system. Using a constant-flow tank greatly increases the precision of the amount of material applied.
Hand-application Equipment
Hand applicators may be effective in treating areas not easily accessible with power equipment or small areas with permanent installations such as fence posts or utility poles. The most commonly used hand-operated injector resembles a giant hypodermic needle. It is most efficient when the soil is marked off in grid fashion and injections made on the corners of 8- to 12-inch squares. It is necessary to seal the soil surface.
Application Rate
Before calibrating equipment, find the speed at which an applicator can be drawn through your soil. Do this for a plow applicator when you open the field for fumigation. For a blade or chisel applicator, make a few trial trips through the field. Determine tractor speed with a tractor tachometer or a spray speedometer.
Determine coverage width for each nozzle or orifice. Measure the distance between chisels for the chisel applicator, divide the width of cut of the plow by the number of metering orifices for the plow-sole applicator, and measure the distance between nozzles on the blade applicator. Use the following formula to calibrate the equipment; that is, to find the number of seconds required for fumigant from one nozzle or metering orifice to fill a pint measure.

Where T = time (in seconds) to fill a pint measure
S = speed (miles/hour)
R = application rate (gal/A)
D = distance (in inches) between nozzles
C = equation constant 44,550
Example Using the formula above, find the time in seconds for the fumigant from one nozzle to fill a pint jar when nozzles are spaced 6.25 inches apart, tractor speed is 2 miles/hour, and application rate is 30 gal/A.

Adjust pressure and choose the right nozzle tip to get the desired flow and rate.
Clean application equipment thoroughly with a light oil, leaving an oil film over all surfaces as a protection against rust and corrosion.

